
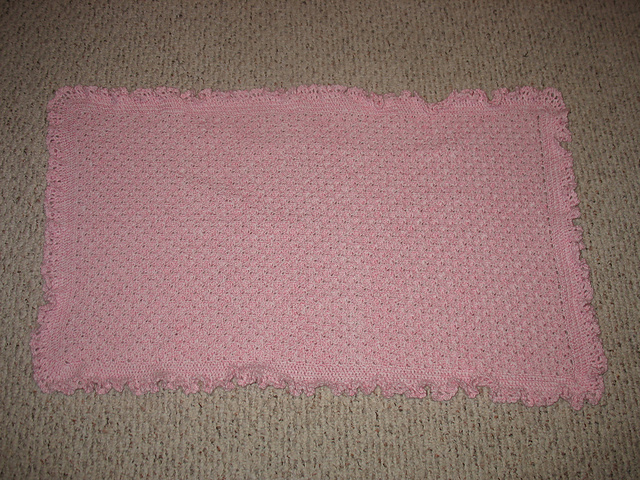
Grandma's Scalloped Baby Blanket
Materials:
4-5 skeins of baby yarn. (The picture uses Bernat Softee Baby)
Size G hook (I crochet tight so I tend to go up a size. This is the size the pattern called for.)
Scissors
Needle to weave in ends
Abbreviations:
CH - chain
SC - single crochet
SP - space
SK - skip
DC - double crochet
ST - stitch
Pattern:
CH 119 to measure about 28 inches.
Row 1: SC in second CH from hook, (SK 2 CH, 5 DC in next CH, SK 2, SC in next CH for a shell) 19 times, end SK 2, 3 DC in last CH, CH 1, turn.
Row 2: SC in same DC as turning CH and in next DC, * CH 1, DC in next SC, CH 1, SC in second DC of next shell, CH 1, SC in 4th DC of same shell, repeat from * across, end CH 1, DC in last SC, CH 3, turn.
Row 3: 2 DC in base of turning CH, * SC in CH between next 2 SC, shell in next DC, repeat from * across, end SC in last SC, CH 4, turn.
Row 4: * SC in second DC of shell, CH 1, SC in 4th DC of same shell, CH 1, DC in next SC, repeat from * across, end SC in turning CH, CH 1, turn.
Row 5: SC in first SC, * shell in next DC, SC in CH between 2 SC, repeat from * across, end 3 DC in turning CH, CH 1, turn.
Repeat rows 2 through 5 for pattern, working on 19 1/2 shells to measure 30 inches from start, end with row 2 or 4, CH1.
Border: SC closely around, DC in each ST, SK CH 1 SP between 2 SC, 5 SC in next 3 corners, 2 SC in side of each DC, SC in base of each DC on other end, join, CH 3. 2 DC in base of CH 3, SC in each SC with 5 SC in corner STS, end 2 DC in base of CH 3 (4th corner), join, CH 3.
Work 3 more rows of DC with 5 DC in each corner.
Row 6 - Ruffle: * (DC, CH1) twice in EVERY OTHER DC, repeat from * around.
Row 7: (DC, CH 3) in each DC.
Picot Row: In each CH 3 SP, work (SC, CH 3) twice.
Let me know if you have any questions!
Happy crocheting!


